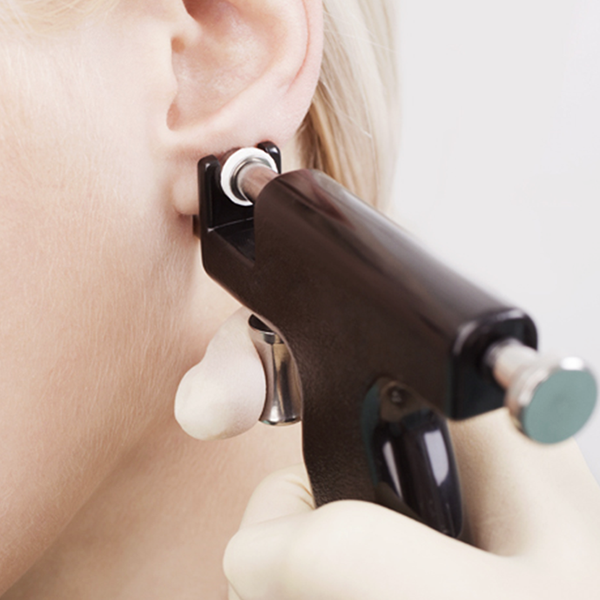
Before we get into what you should expect following a piercing, the details of proper aftercare, healing time and how to know if something has possibly gone wrong, we’d like to start by directing you to our previous Piercing 101 post in which we discuss the pros and cons of piercing guns versus needles. As you’ll learn by reading that article, opting to use a sterile needle rather than a gun is the first step in executing a better piercing with a smoother healing process. Now, here’s everything you need to know about piercing aftercare.
Cleaning Routine
Once the piercing is completed, the piercer’s job is done and yours begins. Keeping the area clean is key and you can do so with soap and water or a saline solution. As celebrity piercer J. Colby Smith explained in an interview, “alcohol dries the piercing out” and should be avoided. “If [the area] gets too dry, it cracks and bleeds, causing the wound to remain open. I prefer oil-based soaps for this reason. They clean the wound, but also provide oils to soften up the healing tissue."
The Piercing Bible recommends using a pre-packaged sterile saline that’s especially made for wounds (not for contacts!). Simply “invert a cup of warm saline solution over the area to form a seal. For certain piercings, it may be easier to apply using clean gauze or paper towels saturated with saline solution” for five to 10 minutes.
If your piercer has recommended using soap, lather it gently over the pierced area and rinse thoroughly with water. Let it air dry or pat it gently with a clean paper towel that can be disposed of immediately after use. Do not use a cloth or towel, both of which can harbor bacteria. A third option is using a homemade sea salt mixture. Simply add 1/4 teaspoon of non-iodized sea salt to one cup of warm bottled water and use it to clean your piercing.
Whichever option you choose, make sure to wash your hands beforehand and, while the area is wet, you can move the piercing in a circular motion, if need be.
What To Expect During Healing
Some bleeding, swelling, tenderness and bruising are all normal immediately following the piercing and, while it’s healing, you might notice some discoloration, experience some itching or even spot “secretion of a whitish-yellow fluid (not pus) that will form some crust on the jewelry,” reports the Piercing Bible.” Also, “the tissue may tighten around the jewelry as it heals.” The most important thing to note, however, is that even when the piercing seems healed, it might not be, so continue cleaning and caring for it. This is because “tissue heals from the outside in and although it feels fine, the interior remains fragile.”
What You Should And Shouldn’t Do
First things first: Do NOT pick, scratch or move your piercing. Avoid using soaps “containing triclosan, as these can damage cells” and “avoid ointments as they prevent necessary air circulation.” Cleaning too often, friction from clothing and constantly playing with the piercing can delay healing and result in the growth of scar tissue. Be sure to leave your jewelry in for the entire healing process and, if for some reason you really need to remove it, visit your piercer -- do not take out the piercing yourself!
While your piercing is healing, “make sure your bedding is washed and changed regularly. Wear clean, comfortable, breathable clothing that protects your piercing while you are sleeping. Showers tend to be safer than taking baths, as bathtubs can harbor bacteria,” says the Piercing Bible. Also, be sure to “avoid all oral contact, rough play, and contact with others’ bodily fluids on or near your piercing during healing.”
Note: Genital piercings are perhaps the hardest to heal and “can bleed freely for the first few days.” Aftercare will require that you “urinate after using soap to clean any piercing that is near the urethra”, use a barrier “such as condoms, dental dams, and waterproof bandages to avoid contact with your partners’ body fluids” and, “after sex, an additional saline soak or clean water rinse is suggested.”
Possible Problems
Even if you notice a lot of swelling, redness or fluid, this doesn’t mean that your piercing is infected — it might just be irritated. Don’t panic! Instead, visit your piercer immediately and follow their advice. Remember: It’s always best to talk to your piercer about any concerns you have.
Standard Healing Times
To heal completely (that means no more swelling, fluids or redness), every type of piercing requires a different amount of time. Healing time will mostly depend on what area the piercing is in and how you take care of it. Earlobes, for example, can take anywhere between two and three months to heal while cartilage piercings require anywhere from three to 10 months. Although everyone and every piercing is unique, Infinite Body suggests these standard healing times.
| Ear Piercings | Healing Time |
|---|---|
| Earlobe | 6-8 weeks |
| Tragus (front of the ear canal) | 4-8 months |
| Anti-tragus (cartilage above the earlobe) | 4-8 months |
| Rook (cartilage between the outer and inner concha) | 6-10 months |
| Daith (innermost ridge of cartilage) | 6-10 months |
| Snug (outermost ridge of cartilage) | 8-12 months |
| Conch (cartilage just outside the ear canal) | 6-12 months |
| Industrial | 6-12 months |
| Facial Piercings | Healing Time |
|---|---|
| Nostril | 2-3 months |
| Septum | 6-8 weeks |
| Tongue | 4-6 weeks |
| Lip / Labret | 6-8 weeks |
| Monroe (upper lip) | 6-8 weeks |
| Dahlia (two separate piercings located on the corners of the mouth) | 10-14 weeks |
| Medusa | 6-8 weeks |
| Surface Piercings | Healing Time |
|---|---|
| Eyebrow | 6-8 weeks |
| Nipple | 6-12 months (female) 4-6 months (male) |
| Navel | 8-12 months |
| Dermal Anchors | 2-6 months |